In this mode, it has two screens, Metro Tasks Screen and View Screen. The user can toggle the “Show Tasks Screen” button to switch between these two screens. It can also switch from Metro Tasks Screen to View Screen by clicking at a task button.
This mode allows the user to utilize the available screen space. When mouse move close to the borders of the frame in view screen, if there are tools attached to that border, an extended panel will slide out. Clicking at the Show/Hide button on the extended panel will bring the tools into the view. The Backward button on the bottom extended panels will move the previous document into view. The Forward button will move the next document into view. The user can also use the scrollbar to move documents. The Fit into Screen button will make each docked document to fit into the screen.
1. Metro Tasks Screen.The customizable task buttons will be displayed on this screen. The simple information can be put over each task button. Both the Header and the Footer are customizable too.
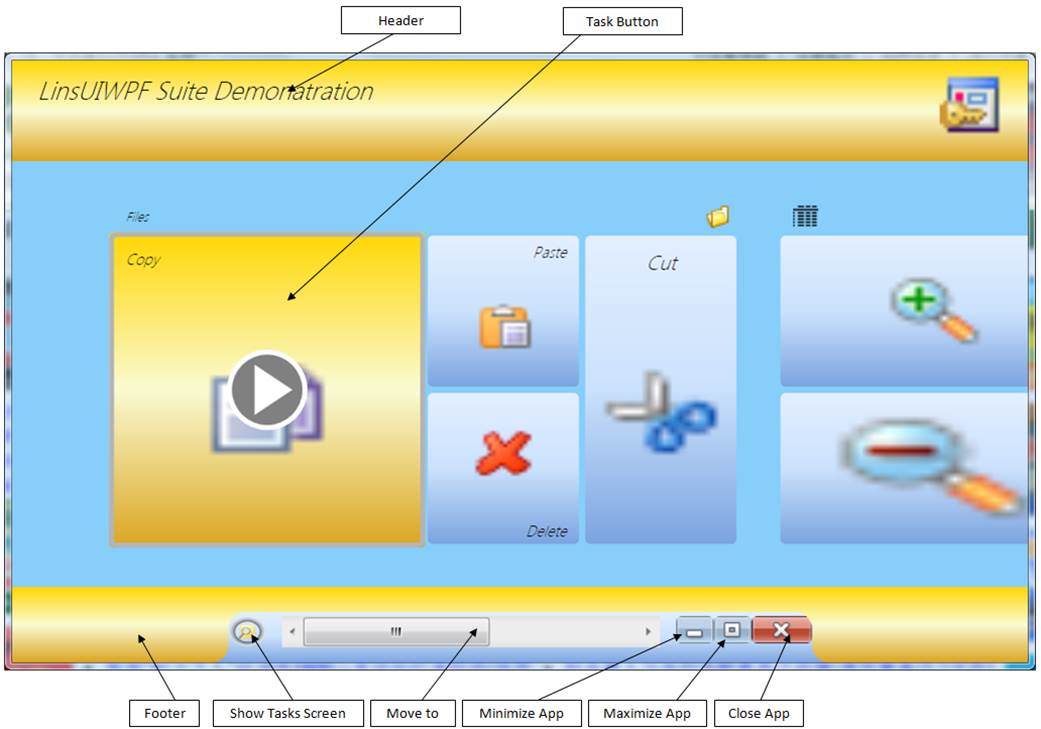
- Show Tasks Screen – Users can toggle this button to switch between Metro Tasks Screen and View Screen.
- Move to – Users can scroll to see the task buttons which are outside the visible area.
The documents, panels, and tools are displayed on this screen.
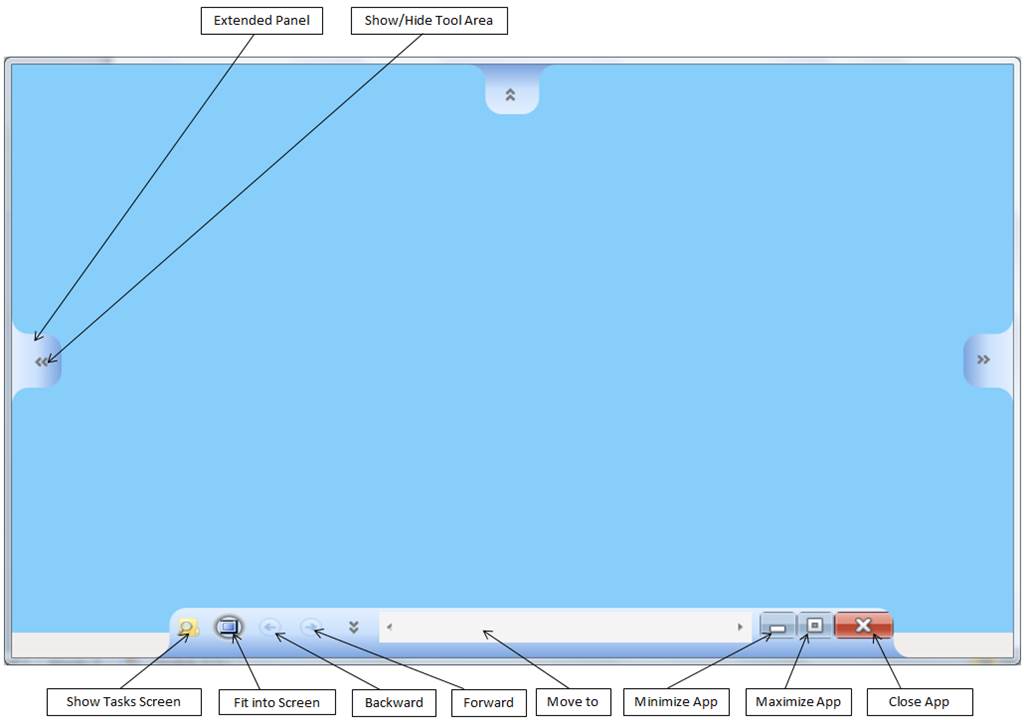
- Show Tasks Screen – Users can toggle this button to switch between Metro Tasks Screen and View Screen.
- Move to – Users can scroll to see the documents which are outside the visible area.
- Fit into Screen – When this button is checked, docked document will be stretched to fit into the screen and is non-resizable.
- Backward – Scroll to the previous docked document.
- Forward – Scroll to the next docked document.
